What is the rifling cut with?
The ribbing panels are made of MDF and are cut with regular carpentry tools. The choice depends on what you have to cut:
- Circular or table saw: For long, straight cuts, with a blade with fine teeth (60 or more). Gives the cleanest result.
- Miter saw: most convenient for making 90° or 45° cuts on the ends of panels.
- Pendulum saw (jib saw): useful for cutting out (sockets, switches), with fine blade.
- Fine-toothed handsaw and miter box: option for a few small cuts if you don’t have other tools.
You will also need: tape measure, square, pencil, masking tape, fine sandpaper (120–180 grit), vacuum cleaner and protective equipment. MDF dust is fine, so wear a mask and safety glasses and work in a ventilated area if possible.
Preparation: measure twice, cut once
- Measure the height of the wall at several points, because ceilings and floors are not always perfectly straight.
- Check the length of the panels in the product sheet and compare it to the height of the wall.
- Leave a small tolerance at the ends, as recommended in the product sheet, so you can easily adjust during assembly.
- Mark the cutting line with a square and pencil on a panel placed on a flat and stable surface.
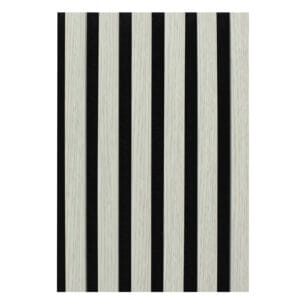
Not sure how many panels you need? On the decorative ribbing category page you can find the available widths (20, 28.5, 30, 40 and 60 cm), so you can calculate the number of panels.
How to make a clean, splinter-free cut
- Place masking tape on the cutting line. Reduces the risk of chipping the decorative layer.
- Cut with the panel facing down when using a circular saw, because the teeth of the blade come through the top of the piece and chip there. For a jigsaw, the rule is reversed: cut with the panel facing up.
- Let the blade do its work. Don’t force it; excessive pressure will cause chips and crooked cuts.
- Use a guide , such as a metal ruler clamped to it, for long cuts.
- Smooth the edge with fine sandpaper and clean the dust before assembly.
Do a test on a leftover piece before your first „real” cut. In a few minutes you’ll know if the blade is right and if you need extra tape.
Corners: inside and outside
The corners are where the rifling looks the most „professional” or the most amateurish. You have a few options:
Inside corner (two walls meeting)
The simplest solution is to stop the first panel against the wall and attach the other panel to it, in a straight joint (cut at 90°). The joint can be masked with a thin layer of silicone in the color of the panel.
Outer corner (corner that protrudes forward)
Here you have two options:
- 45° cut (angled joint): the two panels meet at a clean angle, without the end being visible. It requires precision, so you need a correct angle cut and a trial cut beforehand.
- End profile: covers the cut end and provides a finished edge, easier to achieve than a 45° angle.
Termination profile: when to use it
The end (or closing) profile is the piece that „closes” the edge of a ribbing surface. You use it when:
- the panels end in the middle of the wall, not in a corner;
- you want to hide the cut end of the last panel;
- you want an even edge at an outside corner, without cutting at an angle.
In our range you will find the Closing / Termination Profile for Ribbing : MDF profile, 21 mm thick and 2600 mm long. It is fixed with silicone suitable for the material and surface, on clean, dry and degreased surfaces. It is intended for indoor use and is not recommended for outdoor areas or areas exposed to moisture.
Cutouts for sockets and switches
- Turn off the power at the fuse that powers the outlet or circuit breaker.
- Mark the cutout on the panel, carefully measuring the position relative to the edge of the panel and the electrical box.
- Drill the corners with a drill, then cut with a fine-bladed jigsaw.
- Check the fit before gluing. Sand the edges lightly if necessary.
If you don’t feel safe near the electrical installation, call an electrician for the sockets and switches.
Common mistakes when cutting
- You cut without masking tape and chips appear on the face of the panel.
- You’re using a worn blade or one with large teeth. The result is a ragged edge.
- Cut without a sample. One measurement error means a wasted panel.
- You forget to leave tolerance at the ends and you can no longer adjust the panel during assembly.
- Do not clean the dust before gluing, and the glue or silicone will not stick well. For choosing the glue, see the installation guide .
Frequently asked questions
What is the rifling cut with?
With a circular or table saw with a fine blade for straight cuts, with an angle saw (mitre) for ends and with a pendulum saw for cutouts.
Can I cut the rifling with a handsaw?
Yes, for a few small cuts, with a fine-toothed saw and, ideally, an angle grinder. For many cuts, a power tool is more convenient and precise.
How do I avoid edge chipping?
Apply masking tape to the cut line, use a fine blade, don’t force the cut, and for the circular saw, cut with the panel facing down.
How do I make a clean outside corner?
Either cut both panels at 45°, or use a finishing profile that covers the end. The second option is easier to do.
What do I do with the panel left over after cutting?
The leftovers can be used in smaller areas, for example above or below a window, or saved for cutting samples for the next panels.
Ready to assemble?
Choose the panels from the decorative ribbing category and complete with the finishing profile . If you have questions about quantities or special cuts, you can write to us via the contact page .